How Git Works
Understand the core concepts of Git including commits, repositories, working directory, and staging area. Learn the essential terminology and workflow that every developer needs to know.
Before delving into the internal workings of Git, it's essential for you to become acquainted with the terms, mechanisms, and concepts that govern it.
Git Terminology
The Commit
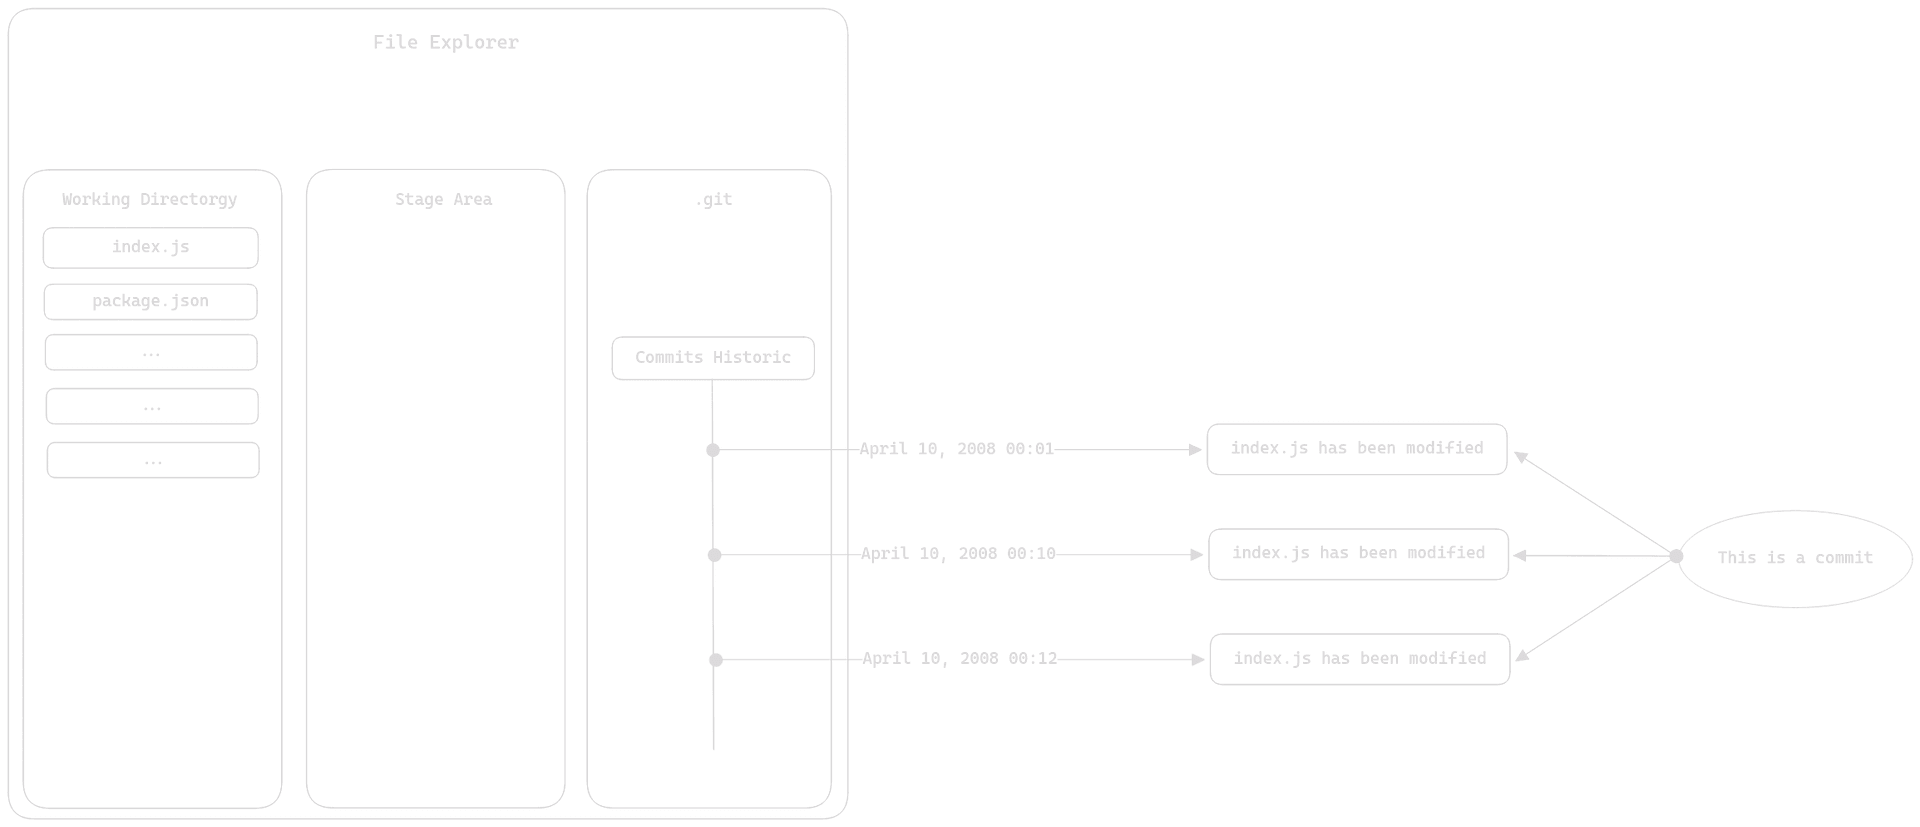
A commit is a point in the evolution of a file. Let's use an image to explain this statement:
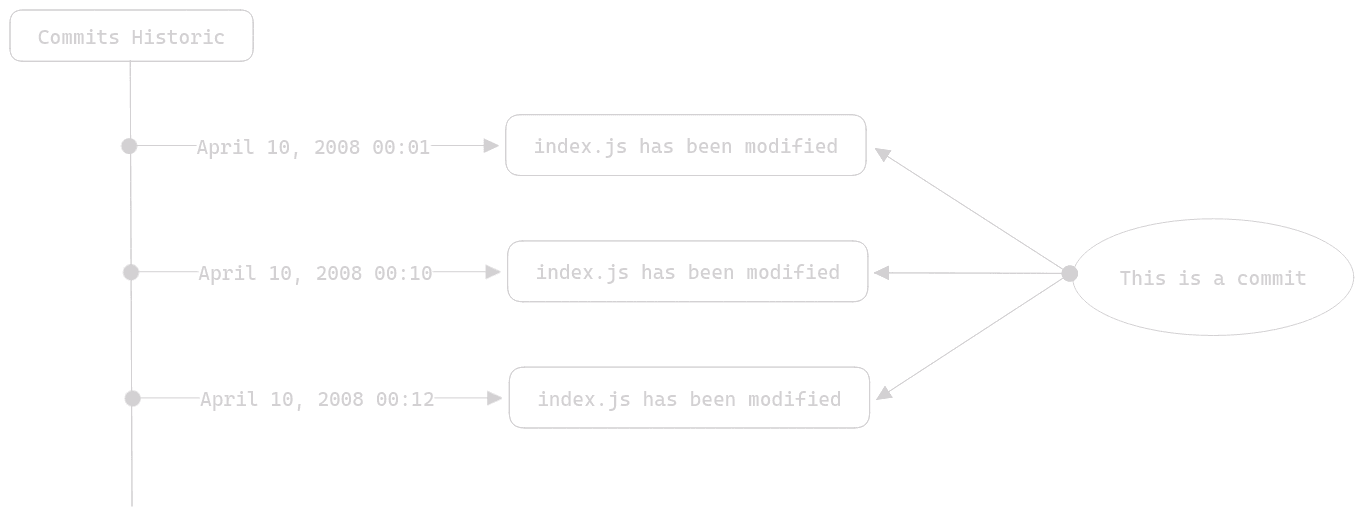
As you can see in this diagram, commits are stored within a history, which allows you to track the evolution of your files in your local repository (we'll discuss this term shortly). The term "commit" could be translated as "validation" in this context. A commit is manually made by the developer. Let's take an example:
Note:
You've developed a function with complex behavior, and the last thing you'd want is to rewrite it because you lost it. In this case, you'll interact with Git and make a "commit" (a validation) so that this function is etched in stone. Even if you accidentally delete it, it would continue to exist somewhere in a previous version of your file (stored in your local repository).
By asking Git to make a "commit," you're essentially telling Git to create a new version of your file. A version in which your function exists no matter what happens to your file. So, a commit is a validation of a modification.
There are some options for commits. In fact, to make a commit, there's a requirement: to give a "name" to this commit. We refer to it as a message. This message serves to describe the changes made by this commit. If we return to the example above, a proper commit message would look like: "Implemented my super useful function." By assigning a message to your commit, it's as if you're annotating your modification, similar to how you write code comments. A commit message is mandatory.
Note:
Pro tip: The more descriptive your commit message is, the more you'll thank yourself when looking for a particular change, which you can find quickly thanks to the clarity of your messages.
Now that we've talked about the commit message, let's discuss how you tell Git which files you want to include in your commit. For this part, we'll need a good old diagram:
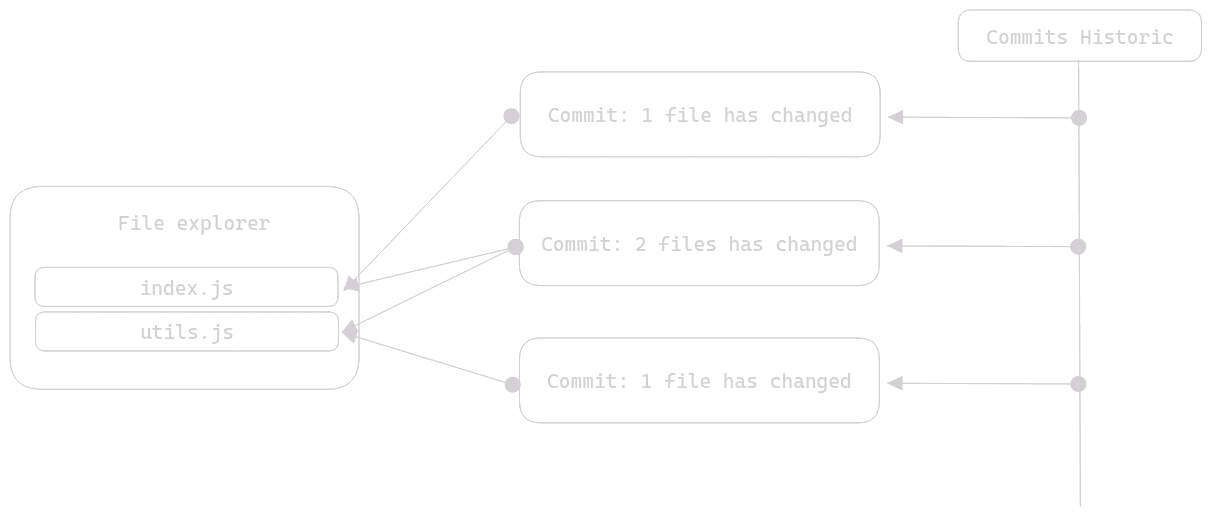
Commits can affect 1 file or a set of files. For example (and this is generally recommended), you might want a commit to affect only one file, for the sake of atomicity. If that's the case, take a cookie and don't change anything; that's what's needed. However, there are times when you have changes that would be illogical to split into different commits. In this case, you can very well tell Git to create 1 commit for 2 files.
In reality, the fact that a commit affects a set of files is not a problem at all. It should just make sense to you and, most importantly, not become a constraint in the future. It's not something that can be explained; only your experience with Git will make you understand it. But know that once you've grasped (in practice) how commits work and what they're used for, you won't be able to do without Git.
However, since you're reading this article to learn more about Git, especially this section for understanding commits, let's still try to understand why those who took a cookie were entitled to it.
Note:
Example scenario without proper commits:
Imagine you're working on a project with Git and making changes, but making fewer commits. You make many changes such that after a while... your program no longer works at all. You search for the cause by delving into the code, but there's no way to find the change or changes responsible. And, of course, your last commit was two hours ago.
You have no choice but to torture your mind and review everything you've done in the past two hours, or restore the version of your code that removes all the changes you've made in those two hours.
In fact, your mistake was not making commits as you progressed. See it as an opportunity. You'll never make the mistake of not appreciating Git to its true value. If you had made your commits as you progressed, you could have reverted to a previous version, tested it, seen if it fixed your problem or not, and restored a functional version that wasn't far back in time.
We're not talking about regularity over time (making a commit every x minutes) but rather in terms of progress. To give you an image:
A puzzle is a set of pieces that, when assembled, form an image.
A project is a set of pieces of code that, when assembled, form an application.
You'd probably find it absurd that when making a puzzle and you put the wrong piece, instead of changing the misplaced piece, you undo the whole puzzle. Well, it's exactly the same with an application.
Best Practices for Commits
The idea is that your commits should not do too much. A commit should not:
- Create a user interface
- Create a password generation algorithm
- Fix a bug
All in the same commit.
Generally, it's recommended to make a commit for a significant change and its related modifications. For example:
Note:
Acceptable commit example:
You need to fix a bug in your password generation algorithm and add a feature to that algorithm.
It's acceptable to include these two changes in the same commit, but it's always better to limit your commits to a significant action.
By a significant action, we mean modifications that bring value to your code:
- Adding a comment to a code line is not significant
- Commenting a complex class is
- Adding a feature to your application is significant
- Fixing a bug is too
When working with Git, you can ask yourself:
- Do I want my change to be independent of the others?
- If I need to revert to this commit, will I have to do something else?
- Does this change really deserve a commit?
The Local Repository
Git works with repositories, and the concept of a repository is quite simple to understand. A repository is a place where a history of commits is stored. When we talk about a local repository, you could translate it as a folder.
To be precise, a local repository is not just a folder; let's say it's stored in a folder. With Git, a local repository is stored in a hidden folder named .git. The presence of this folder at the root of your project makes it a Git project.
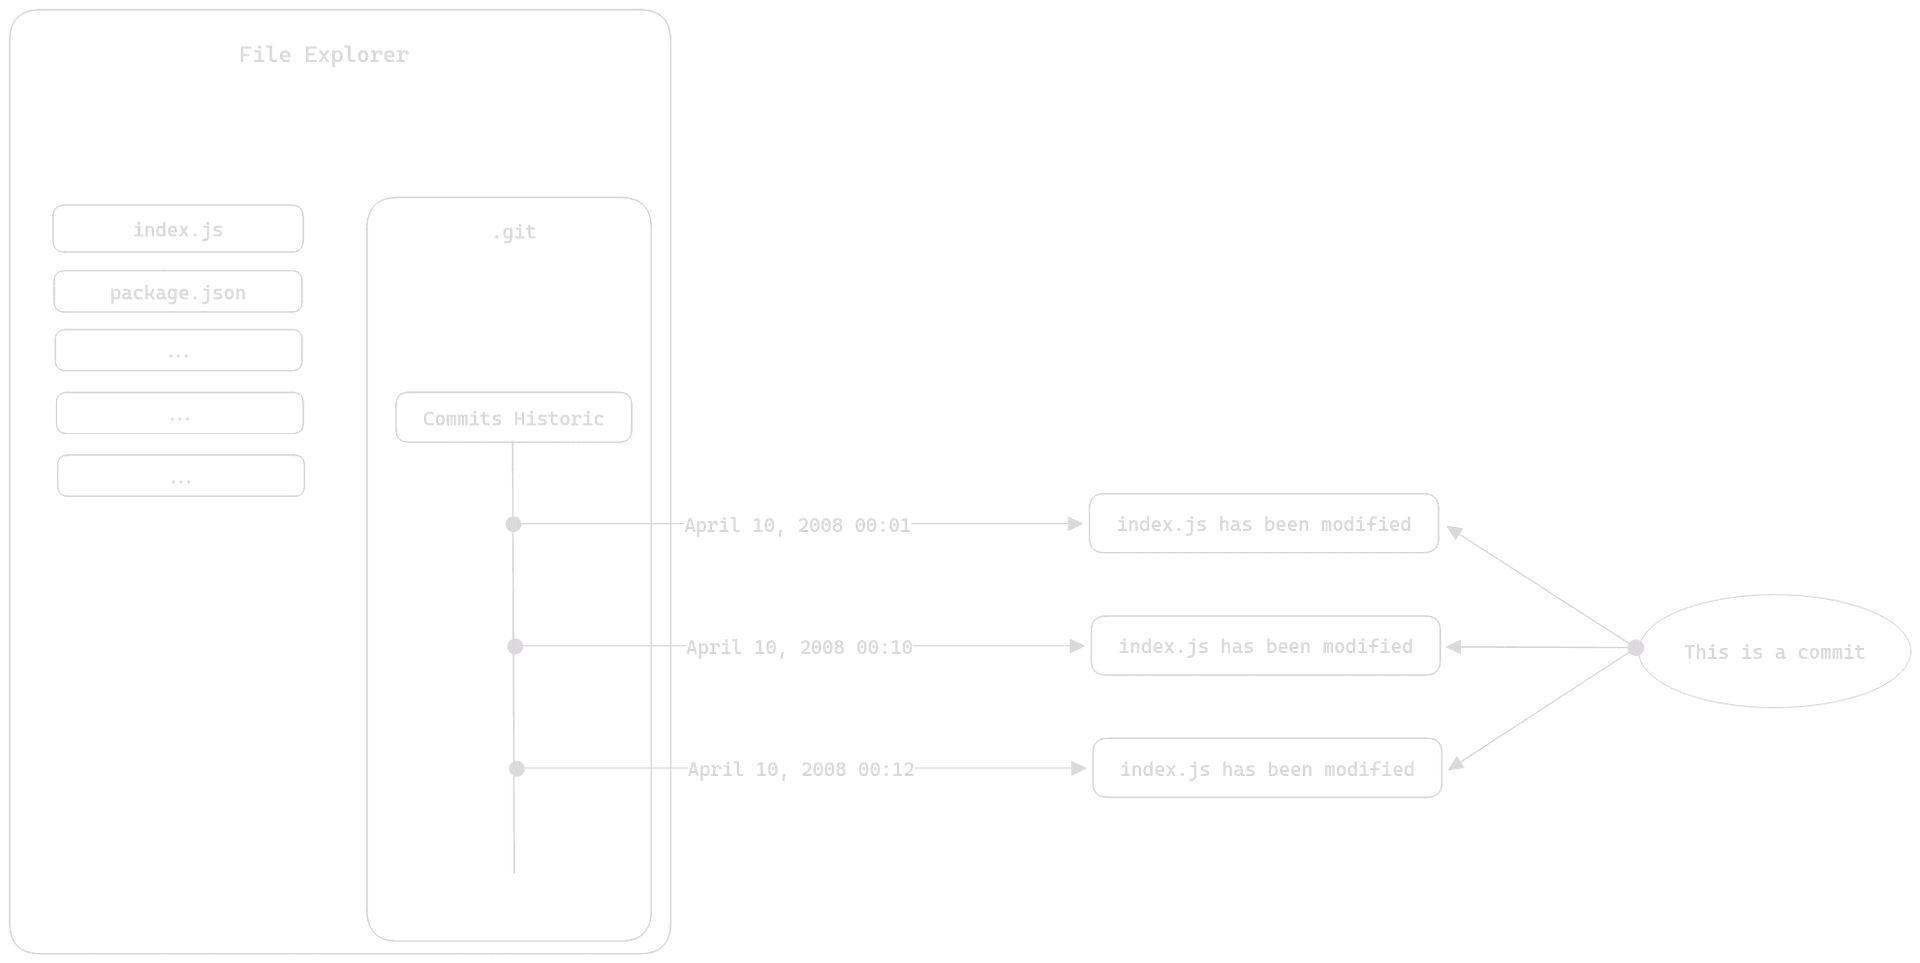
This diagram shows in a bit more detail how Git organizes your projects. It demonstrates that the actual local repository is contained within the .git folder at the root of your Git project. This is why saying a Git repository is the folder containing your files is a somewhat simplistic (and incorrect) shortcut.
Note:
Important: If you were to delete your local repository (the .git folder), all your commits would be lost, and thus your function as well. Since your local repository stores your commit history and therefore your commits, deleting it means losing all your version history.
The Working Directory
Now we're getting into the core of Git. The working directory is the place where your files are located. This might sound abstract, so let's use a diagram to understand it:
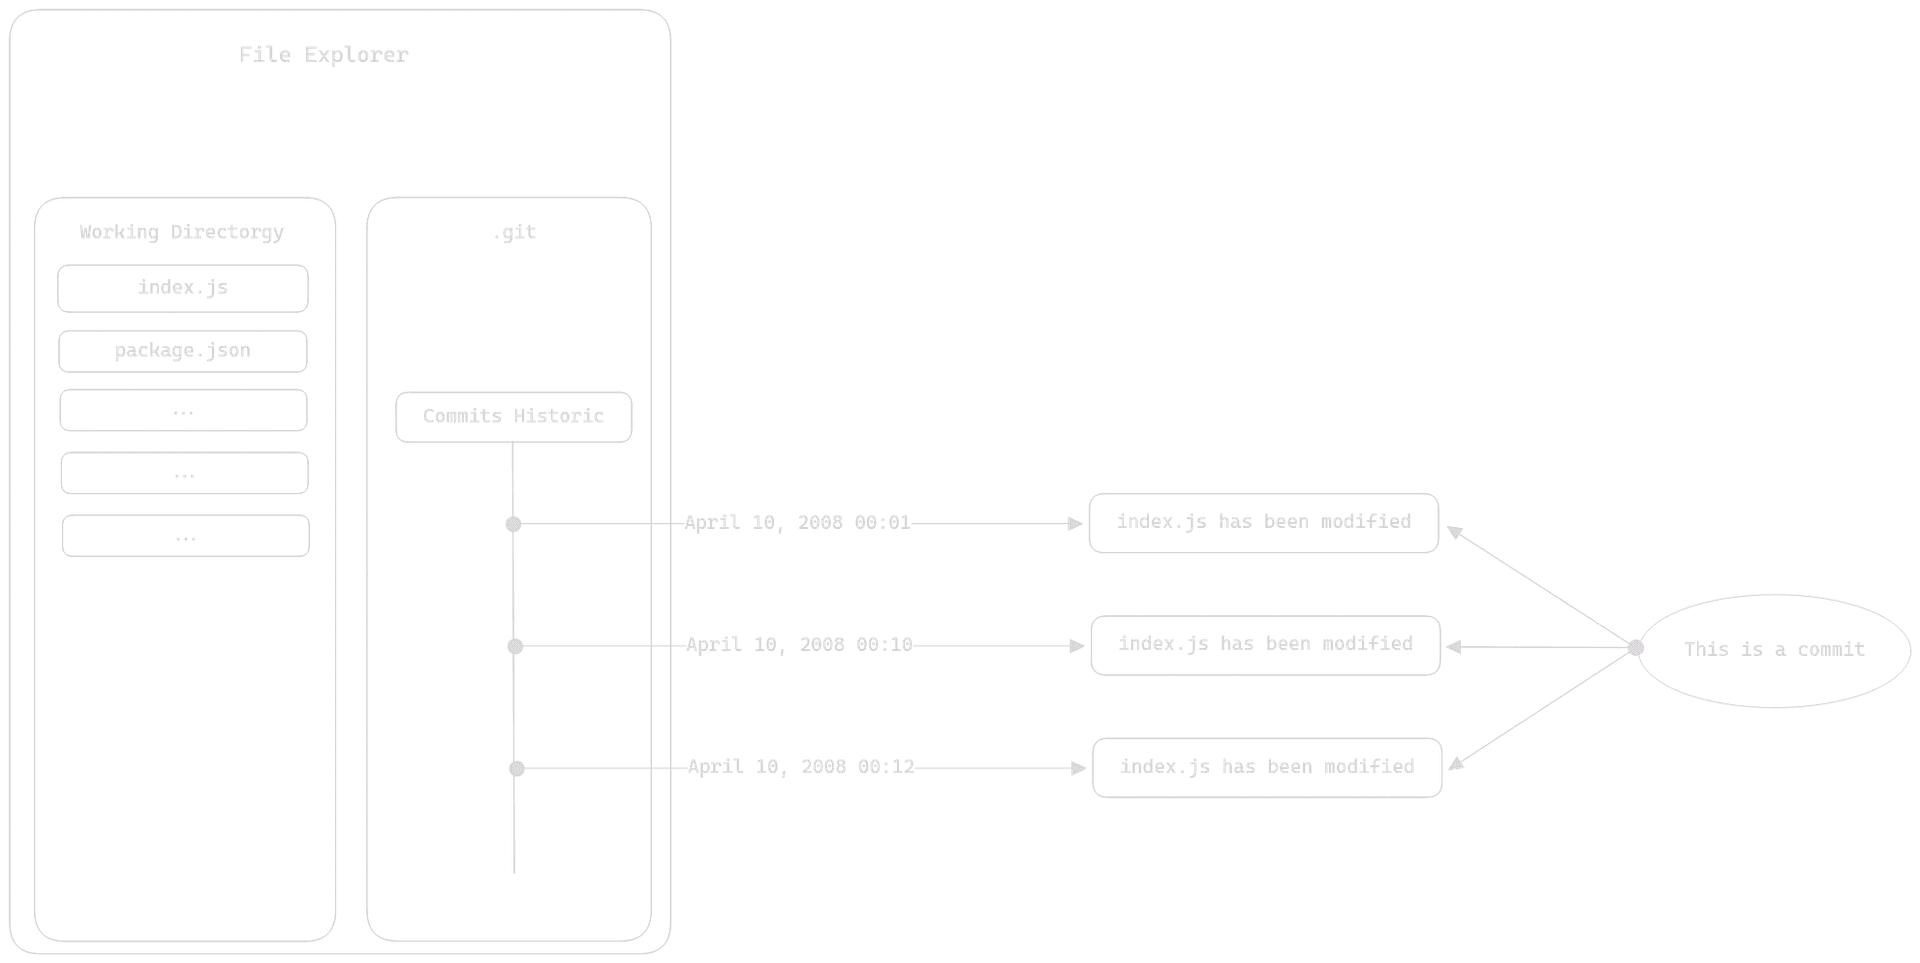
The working directory is where you make your modifications, which is why it's called the "working directory." You'll spend most of your time working in it. This is also why saying that the folder containing your Git project is your local repository is incorrect; it's your working directory.
The Stage Area
The staging area is the only Git area that is not as tangible as the working directory or the local repository. In the sense that it doesn't engrave anything in stone, this Git area is used to prepare the modifications you make in your files in the working directory for sending to your local repository. It acts as a "buffer zone" between your working directory and your local repository.
This is how you can represent the staging area. It is between the working directory and the local repository, hence the name "buffer zone."
Note:
Theater analogy: Imagine you're in a theater. The dressing rooms of the actors represent the working directory. The staging area is the backstage, where actors get ready to go on stage. And the local repository represents the stage.
Now, let's consider a typical use case of Git:
You're working on a class, and you're in the dressing rooms (working directory). Then, you prepare your modifications to go on stage, and you're behind the scenes (staging area). You make a commit for your class, and you send it to the front of the stage (local repository).
In practice, the staging area is just a preparation zone for commits. Let's use another diagram to understand it better:
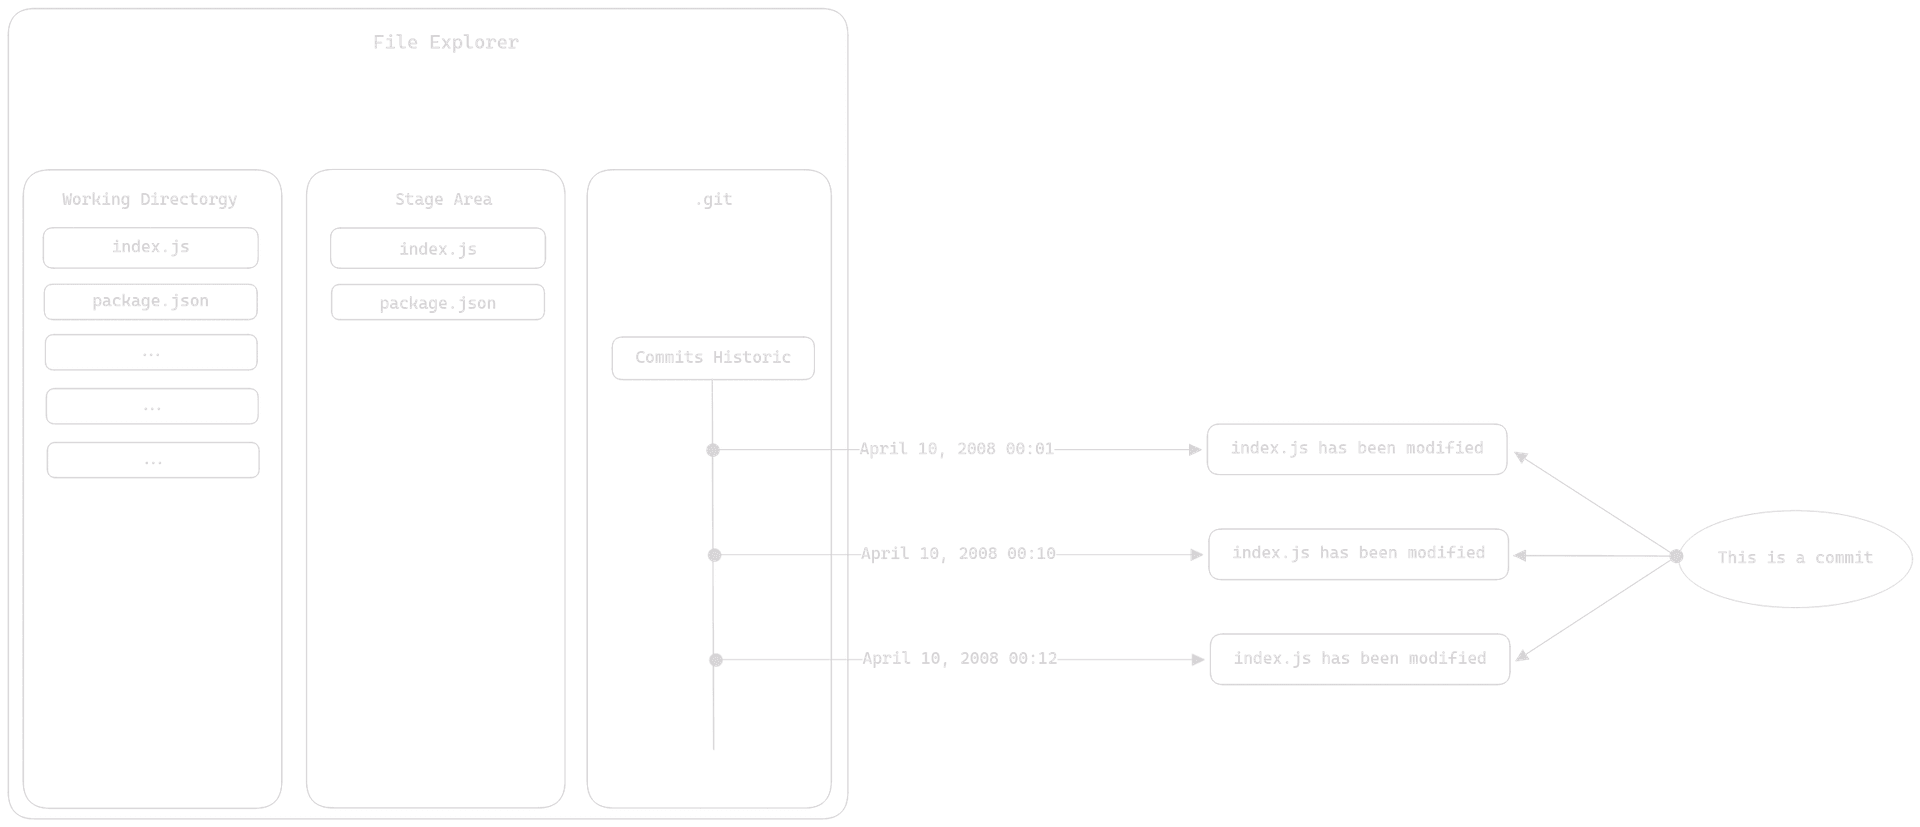
This is what happens when you want to make a commit for two files. You ask Git to prepare your two files for a commit. Git moves these two files into the staging area, and then you simply make your commit. Both versions of your files are sent to your local repository under the same commit.
Note:
Note: You cannot ask Git to prepare a file that has not been modified since its last version in your local repository.
Conclusion
Now that you have a good understanding of the basics of Git, you're ready to start working with Git. However, there are still some more advanced topics and commands to discover, which we didn't cover in this brief introduction. You now have a solid foundation to begin using Git, and we'll explore those additional concepts later on.
Summary
- A commit is a snapshot of the changes made to a file
- The working directory is where you make modifications to files
- The stage area is a buffer zone between the working directory and the local repository, used to prepare files for the next commit
- The local repository stores and tracks your commits
- Deleting your local repository will remove all your commits and, thus, all versions of your files (except for those in the working directory)
Note:
In the next article, we'll explore Git commands to start using Git practically.